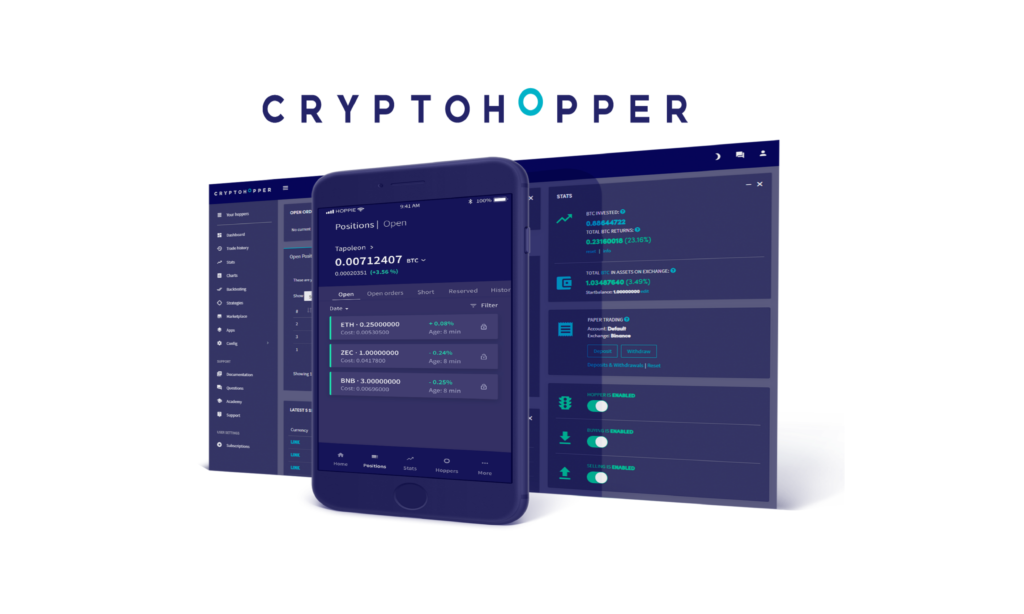
We have already reported on our first experiences in the test with Cryptohopper. The interest in Cryptohopper settings is huge. So we were asked more and more often which Cryptohopper settings are the best. Whether for beginners or advanced, we will explain exactly how Cryptohopper works and how you have to proceed. We’re also looking at how to set Cryptohopper settings in 2023. In this post we have summarized the complete knowledge about Cryptohopper. This has turned into a MEGA GUIDE. Here you will find all necessary information about Cryptohopper and the settings for it! You will also receive tips from us to create the right strategy for you.
Cryptohopper Trading explained briefly and clearly
Cryptohopper is a trading bot that executes buy and sell orders fully automatically for customers. Cryptohopper not only manages your cryptocurrency, but also exchanges it with each other on the respective exchange. How the bot trades the cryptocurrency can be specified in the settings beforehand. To save a lot of research and analysis, you can choose one of many trading strategies and let the bot trade afterwards. It is also possible to let the bot act according to certain “signals”. These signals are available at Cryptohopper both free of charge and for a fee. This makes Cryptohopper suitable for both beginners and advanced users.
In order to take advantage of the bot, you have to take care of the API connection between Cryptohopper and your exchange after registration. You create your API key on your respective Exchange and this makes it possible that you can use these keys to connect the bot to the exchange and Cryptohopper can access and communicate with the exchange. (Read on and learn how to connect via API)
Is Cryptohopper reputable?
There are allegations online that Cryptohopper is not serious. It is often associated with the “Lion’s Den” scam. People advertise dubious trading bots, which then prove to be scam. In this way, dubious companies harm Cryptohopper. Unfortunately, many think of it and think Cryptohopper would be scam. Even large crypto news portals like coincierge then classify cryptohopper as frauds.
At this point it should be clearly pointed out that Cryptohopper is a reliable and reputable company based in the Netherlands. This is clear from the fact that over 100,000 traders are already registered with Cryptohopper. An astonishing number, considering that the company was only launched on August 12, 2017 by two brothers. The two Feltkamp brothers are cryptocurrency investors and manage, among other things, billions of dollars in the portfolio.
In order to trade on Cryptohopper you do not have to deposit money directly with Cryptohopper. They connect to their crypto exchanges using an API key. These exchanges, which are then connected to Cryptohopper, are then traded. This means that Cryptohopper has no direct access to your money. Of course, you can increase the security of your Cryptohopper account with 2-factor authentication.
Attention: Exclusive offer for crypto-invest.io readers!
Transaction costs are, besides the costs for the trading bot, the biggest cost factor in trading. If you register with the crypto exchange Binance via our link, you save 5% transaction costs lifetime.
Opinions and experiences of Cryptohopper customers
We are really only interested in what people say who have already tested Cryptohopper, so let’s take a look at what we find about Cryptohopper.


On the site of Cryptohopper directly we find further customer reviews:

However, the customer’s opinion on the side of the provider is rather questionable, since a provider would hardly publish bad reviews about himself. Therefore, other customer opinions that can be found in forums etc. are all the more important.
How beginner-friendly is Cryptohopper?
Most trading bots are mostly aimed at experienced traders. Cryptohopper, on the other hand, contains a number of functions that are also aimed at newcomers to trading. Of particular note is the Hopper Academy, which is available to all members. There, all members have access to a number of videos that carefully explain how Cryptohopper works and how to get the most out of the trading bot. In addition, Cryptohopper has an active community that can prove very useful for newcomers. There are telegram groups and a special forum for members, which is also available in different languages. This way, new members can exchange ideas with experienced traders from all over the world and learn from them. All in all, the information available is greatest compared to other trading bots.
The trading software itself is user-friendly and does not require a professional programming experience. Another interesting option at Cryptogopper is “backtesting”. This makes it easy to check how the set settings work and how the trading bot would act if you choose these settings. That means you can see exactly how much you would have earned in the past if you had chosen these settings. Ideal for beginners to get a feel for the settings.
Also interesting: For beginners who do not yet have an account on a crypto exchange, there is the option of paper trading. This option can be activated at any time and retrieves information from the exchange in real time. This allows beginners to try out trading in the robot free of charge. So you trade with play money and can learn something new.
First steps with Cryptohopper: The registration
When we first looked at Cryptohopper, we opted for the free 7-day trial. It is never a bad idea to be able to test the bot before you take out a paid subscription. To register with Cryptohopper you have to enter an email address, a username and a password. When assigning a password, it is always advisable to choose a longer password with special characters and lower and upper case.

After you have entered the information, you will receive an activation link in your email inbox to activate the account. You must click this link to activate the account. Now you can log into your account and choose the package you want.

You can then assign a subscription to the “hopper”:

You can choose from 3 alternatives:

The packages differ in their maximum number:
- open positions
- selectable coins
- adjustable trigger (this is something like a condition that a trade is executed, e.g. increase in price over a certain limit)
- and finally time intervals in which trading takes place.
You have to decide which package is best for you. The $ 49 per month medium package is pretty good value for money (compared to the competition and the cheapest package). The medium package should therefore be sufficient for most traders. If that’s too expensive, you can buy the cheaper version for $ 19 a month. Professionals probably can’t avoid choosing the most expensive option for $ 99.
Which exchanges are supported?

The following exchanges are supported:
- OKEX
- Binance
- Binance US
- KuCoin
- bitvavo
- Huobi
- Poloniex
- Kraken
- Bittrex
- Bitfinex
- Coinbase Pro
We used Binance for our test. Binance is therefore well suited for trading because having the exchange’s own cryptocurrency (Binance Coin (BNB)) gives discounts on trading fees. These are clearly noticeable in many trades.
API settings for exchanges
1. Step
Go to https://www.binance.com/
2. Step
You go to your account at Binance and then to “API Management” and give the API a name, e.g. “Crypto Hopper”.
3. Step
You have to verify this process by entering the code you received by SMS or from Google Authenticator.
4. Step
You will receive an email from Binance and follow the instructions there.
5. Step
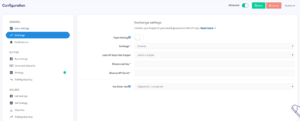
Now navigate to Cryptohopper and go to “config” in the settings and to “baseconfig” in the submenu and then to “Exchange”. You select your exchange, i.e. Binance, and enter the API key and the secret key.
1. Step
Go to https://www.bitfinex.com/
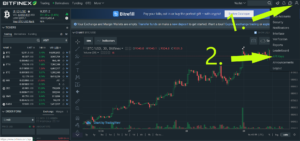
2. Step
Go to your user icon and click on “API Keys”
3. Step
After clicking on “API Keys”, click on “Create New Key”. To do this, check whether the ticks are all set correctly. You use it to check what you can do with the API connection in your Bitfinex account. The default settings can usually be left as they are. Withdrawing your credit is deactivated in the standard settings.
4. Step
Now navigate to Cryptohopper and go to “config” in the settings and to “baseconfig” in the submenu and then to “Exchange”. You select your exchange, i.e. Bitfinex, and enter the API key and the secret key.

1. Step
Go to https://pro.coinbase.com/
2. Step
Go to your user icon and click on “API”.
3. Step
After clicking on “API”, click on “+ New API Key”. To do this, check whether the ticks are all set correctly. You use it to check what you can do with the API connection in your Coinbase account. We have checked “View” and “Trade”. Then at least the trading must logically be made possible.
4. Step
After all settings have been made, click on “Create API Key”.
5. Step
Now navigate to Cryptohopper and go to “config” in the settings and to “baseconfig” in the submenu and then to “Exchange”. You select your exchange, i.e.Coinbase Pro, and enter the API key and the secret key.


1. Step
Go to https://www.kraken.com/
2. Step
Go to Settings and choose “API”.
3. Step
Now click on “Generate new key“.
4. Step
Now check whether the ticks are all set correctly. You use it to check what can be done in your Kraken account via the API connection. Tip: Remove the tick from “Withdrawal”, ie the possibility to withdraw funds from your account via API.
5. Step
Important: Under “nonce window” enter: 1000000. This is important because of HTTP network inconsistencies.
6. Step
Now navigate to Cryptohopper and go to “config” in the settings and to “baseconfig” in the submenu and then to “Exchange”. You select your wallet, i.e. octopus, and enter the API key and the secret key.


1. Step
Go to https://global.bittrex.com/
2. Step
Select “API” via Settings.
3. Step
Now click on “Create New API Key“.
4. Step
If you haven’t set up 2FA yet, do so first. So you have the greatest possible security.
5. Step
Check that everything is activated correctly. Tip: Deactivate “Withdrawal”. This means that you cannot withdraw funds from your exchange via the API.
6. Step
Enter your 2FA code if needed.
7. Step
Now navigate to Cryptohopper and go to “config” in the settings and to “baseconfig” in the submenu and then to “Exchange”. You select your exchange, that is Bittrex, and enter the API key and the secret key.


Tip: It can happen that on some exchanges the secret key for the API connection is only displayed once. It is best to write it down or copy it.
Cryptohopper is more than just a trading bot
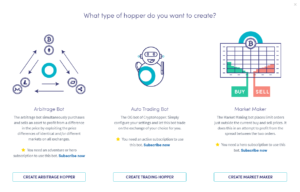
It is now possible to choose from 3 bots. So there is not just the classic trading bot. You now have a choice of three bots.

1. Of course there is still the classic trading bot. Here you can include the technical chart analysis, define strategies or let the bot act according to signals.


3. The Market Maker is available as an additional option. It allows you to automatically swutter over your best trades that your hopper made.
How to configure your “hopper” (classic trading bot)
In this section we want to look at how to configure and set up a classic bot. With a trading bot you have three options: You can “build” a hopper yourself, use a template or let the trading bot act according to signals.
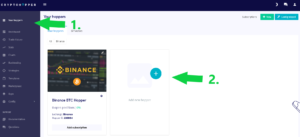
In our experience it is quite simple to use a template, which is why we will show you briefly. A template is almost complete by itself and does not have to be set up great. If you have not yet created a hopper, do so first. To do this, click on “Your Hoppers” and add a new hopper.
When adding a hopper, you are offered the choice between the three trading bots presented earlier. Select the middle bot and click on “Create Trading Hopper“.

Now you can add a template to the bot. You can sort by exchange and select the cryptocurrency you want to trade.


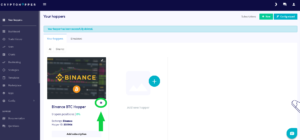
We chose Binance and Bitcoin. When the hopper has been created, you can configure it, delete it and turn it off and on. Simply click on the wheel:

In addition, if you have not already done so, you can add a subscription to the hopper. To do this, click on “Add subscription“.
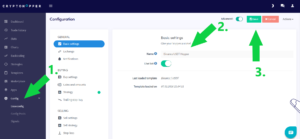
After you have followed everything up to this point, you can now edit the template as desired. First go to “Config” and below it to “Baseconfig“. There you can give the template a name, edit it and save it.

Cryptohopper trading settings explained
After the API settings have been carried out successfully, we now devote ourselves to the individual settings for buying and selling coins. We show you not only step by step how to make the settings for it, but also how to develop a strategy and how to act so successfully.
BUYING
After we have done all the basic settings, we start making the purchase settings. We explain every step and show you how to configure your bot.
BUY SETTINGS
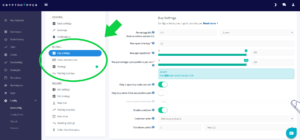

We go through the most important settings for buying the coin with you step by step and show you how to set them.
1. Percentage bid
With these functions, you can make a purchase offer that is both higher and lower than the current exchange rate of the cryptocurrency. Please note: It is not sensible to specify a percentage deviation that is too large, such as 15 or 20%. Because then it may be that with your bid price the order cannot be executed before the time runs out. If you do not want to use this function, enter “0” there.
2. Max open time buy
This option specifies how many minutes a buy order remains open before it is canceled.
3. Max open positions
This option provides information about the maximum number of open positions (investments) that your hopper may have open at the same time. (Note: this also depends on the type of subscription. The cheapest package already contains 80 positions.)
4. Max percentage open positions per coin
Here you can set the maximum number of open positions per coin.
5. Only buy when there are positive pairs
Your hopper only buys coins if there has been a positive price development for a coin within a certain period of time. You can set the time frame yourself.
6. Enable cooldown
With this function you determine whether and how much time should pass in which the hopper does nothing after a purchase or sale of a coin has been made.
COINS AND AMOUNTS
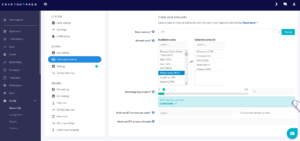

Here you determine which coin you want to trade as the base currency and which other coins are to be traded with it. For example, choose Bitcoin (BTC) as the base currency, and Ethereum and Litecoin should be included as further tradable coins. So the bot trades between Bitcoin and Ethereum, as well as between Bitcoin and Litecoin. Tip: If you are still a beginner and want to grope your way, choose a stablecoin like USDT as “Base currency“. This is not as volatile as other cryptocurrencies.
How many coins (Allowed coins) you can ultimately choose also depends on your subscription. When selecting the coins, it is helpful not to select coins arbitrarily. A brief look at the trend of the past few days or news is certainly helpful.
You can also specify how high the percentage (Percentage buy amount) of your total amount of funds that should be carried out per order. For example, you have a Bitcoin and set 10%. Then the bot trades a maximum of 10% of the BTC in ether or other cryptocurrency. It makes sense not to choose this value very low, otherwise the trading fees will reduce your profits. We use about 3-5%, but our portfolio is relatively large. If you want to specify the maximum execution per order not as a percentage, but in absolute terms, you can enter absolute numbers under “Minimum BTC amount per order“.
In addition, you can determine how much the bot can use of your total amount for trading (Maximum BTC amount allocated). For example, if you have a Bitcoin on the exchange and specify 0.5 BTC there, the hopper will only trade up to 0.5 BTC. This can be helpful if you connect multiple bots to the same exchange. If you only use Cryptohopper, you can also enter the full amount here.
STRATEGY
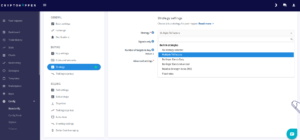

If you want to trade according to a specific strategy, then you can choose a strategy developed by Cryptohopper. You can also add other strategies that you develop yourself or purchase on the marketplace. There are not only paid, but also free strategies from other users. As soon as you have created or acquired a strategy, this is also displayed in the selection of strategies.
By the way, you can also trade according to trading signals. All you have to do is activate “Signals only“. Depending on the signal, the bot buys it immediately afterwards. These signals are also available on the marketplace both free of charge and for a fee.
To get to the marketplace, click on “Marketplace” in the left sidebar and you can buy signals and strategies.

